

Studio e has done it again. Laundry Room is the name of their new fabric line that I didn't know I needed. Isn't all fabric laundry? Now, I can't keep my hands off of these cute prints. This bundle of goodies arrived as one of my brand ambassador packets from Jaftex, the parent company of Studio e. Every few weeks I receive a bundle from one of their about-to-be-released fabric lines. My job is to make something. Anything. Free range quilting. I love the challenge.

One of the other suggestions was an ironing board cover. Why didn't I think of that? I have made plenty of them over the years. I made the one you see here for my "downstairs" ironing. My sewing room is upstairs. Nobody, absolutely nobody, wants to iron clothes on my sewing room ironing board. Unless you would prefer to be covered in random threads. I keep a normal ironing board for guests to use when the occasion arrives. Now it has a cute new cover.
One thing to remember about covering a regular ironing board is that the board is longer than one width of fabric. That gives you the opportunity to add fabric and mix prints like I did with mine. When you add strips of fabric to increase the length, press those seams open to distribute the bulk. You don't want a seam "lump" when you are pressing a tablecloth. Once you have your fabric a good 5"- 6" longer than the length of your ironing board, you can cut it to fit. I lay the fabric face down on a flat surface. Place the ironing board on top and trace the shape of the board a good 2" - 2 1/2" away from the edge of the board. This does not have to be perfect! You want enough fabric around the outside edge to cover the side of the board and to fold underneath a bit. How far from the board you draw this line depends on how thick YOUR ironing board is. Cut out the shape with the excess on all sides. I use my rotary cutter and ruler for the straight edges and round the corners free hand.
You are going to need some bias binding or wide bias tape and something to gather the cover with to finish the raw edges. I have tons of leftover BIAS binding from quilts so I use that, even if I have to sew scraps together. It must be bias binding, not straight of grain binding. The end of your board is round. If you don't have any leftover bias binding, you can purchase binding in packages from those big box stores. I would never put that packaged binding on my quilt, but it works great for this situation. Open it up, press it flat and fold in half with the raw edges even. Starting in the center of the square end, stitch the bias binding to the right side of the ironing board cover, the same way you would sew binding to a quilt. Seam allowance isn't important. Keep your raw edges even and make sure that the binding is wide enough to accommodate whatever you will be using as a draw string. This will create a casing for the drawstring.

For this cover I used elastic as the drawstring. Any heavy cord will work just fine. I just happened to have a spool of 1/2" black elastic so I used that. The elastic has the added advantage of distributing the gathers for you when you put the cover on the board. I use a bodkin to insert the elastic into the casing created by the binding. A safety pin would work just fine, but as someone that sews, I think you should own the proper tools for the job! Once the cover is on the board, pull up the drawstring and tie it in a knot. Trim the ends or tuck them in. If you are the type that takes your cover off to wash it, make sure you leave additional length in your drawstring so that the ends don't get sucked into the cover when you untie the cord. Personally, if I have to take the cover off, it is time to make a new one!.
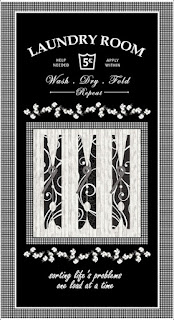
As usual, I chose to cut this one up. I used the top section for a smaller wall hanging. The clothes pin section has great possibilities, but I chose to use it for the backing on my wall hanging. I have to say that I felt a little guilty about that, but I don't need more than one wall hanging in my laundry room. That left the smaller section on the bottom. That was turned into a small 12" by 16" pillow because.... well, why not?

A little quilting, a little binding and this wall hanging was almost finished. Then I decided to add the laundry line to the bottom. My BFF Bernie had given me holder for those small packs of tissues that was designed to look like a mans shirt. A little adjusting and a whole new set of instructions later I am really happy with this addition to my laundry space.
I have shared the instructions for this project with my private group on Facebook. If you would like a copy of the handout, join the Nine Patch A Day Group on Facebook (make sure you add the word "group" when you search for us). The group is private, only because Facebook allows me to share files (like this pattern) in a private group. Everyone is welcome. I am live in that group on most Sunday evenings at 7:00pm (eastern) to answer questions and talk quilting. I would love to have you join us!
Good ideas. I try to stay out of my laundry room as much as possible.
ReplyDelete