Monday, April 27, 2020

CHECK YOUR DNA


                     I have never taken one of those DNA tests like 23 and Me, but I am fairly confident that if I did it would come back saying that I am part squirrel.  I feel that must be true because the synonyms for squirrel are store, hoard, and collector.  I don't think I am in danger of being featured on an A&E program like Hoarders, but I do have a large "collection".  If you asked me what I collect, I would have to say the answer is fabric scraps.
               To be considered a “collector” you must gather from a variety of sources.  I certainly generate scraps from my own assortment of projects, and I curate them from friends.  I have also stood in a 10,000 sq. ft. quilt shop that is owned by a good friend and been offered anything off the shelf.  I turn down that offer in exchange for a garbage bag of scraps.  It is those odd pieces that hold so much promise.  Scrap quilts fascinate me.  To make them the way I like to see them made, with coordinated scraps, you absolutely must become a collector.  Justification for my obsession.

Hoard seems like a severe term in reference to my fabric collection.  After all I do USE those pieces to earn a living.  To be truthful I also must admit that I hold on to some of those pieces, refusing to use them.  Because if I did, they would be gone.  I once owned a shoebox clearly marked “Scraps – Too Small to Use”.  If that means I have a problem, I can live with that. 
Something had to be done to get my scraps in order.  Quick reality check: If this is your sewing space, we probably can't be friends.  Too much organization stifles my creativity.


This week I tackled the storage part of my squirrel issues.  I don't know how you store your collection.  I have always enjoyed wallowing in mine.  Previously I owned a huge basket into which all fabric pieces were tossed.  When starting a scrap project, I would dump a mound of fabric on the floor, surround myself and start sorting until the piles inspired me.  It is wonderfully creative, but not very efficient.  Especially for an easily distracted squirrel.  Ohh, look at that…..

With every nook and cranny exploding with pieces of fabric, I decided to tackle the batiks first.  After a few hours of sorting and a hefty investment in small laundry baskets, these gems now live under my Amara.  Aren’t they beautiful?  Before you start questioning my definition of “scrap” any fat quarter with a piece cut from it constitutes a scrap in my book.  Really small pieces are in a mixed basket under my sewing table.  I also chose to use baskets instead of bins with lids because I work with fabric every single day.  I did not want them stored, I wanted them accessible. 

The blue quilt in the photo that is ready to be loaded into my Amara is made with my Crazier Eights templates using Debbie Maddy’s Shibori fabric line from Moda.  It could have been made from 10” squares, but it really was made from scraps.  I actually bought the scraps from Debbie instead of buying a layer cake to make the quilt! 
The plan is to add another row of baskets behind the batiks and duplicate the sorting of regular cotton fabrics.  I will add additional baskets for Christmas scraps and novelty prints at some point.  Right now I can’t wait to play with those batiks!


Thursday, April 16, 2020

A Series of Unfortunate Events

     We move last summer.  We now live in a different house in a different state, but what I mean by "moved" is that WE literally transported everything we own.  My husband is a do-it-yourself kind of guy.  He is also considered crazy by many.  That doesn't bother him, nor stop him from doing things the way he sees fit.  Today his can-do attitude came in very handy.

     The story begins with the moving of my sewing room.  Because the move was made over several months, almost everything was transported in our mini van.  Including my BERNINA 880.  The top of the line BERNINA machine with a retail price of $14,999.  THAT machine.  I placed my mega machine on the garage floor, without a case, ready to be packed in the van. (It has a soft cover, but I have never actually put the machine away, so I have never even opened the cover.)  I sew every single day if possible.  My thought was, who needs a cover?
     That's when "it" happened.  I won't mention who was carrying the ladder through the garage and turned to tell me something when WHAM.  Right into the screen.  See those cracks?  That's bad, very, very bad.  I loaded the machine for moving and wasn't overly concerned because I know enough about BERNINA to know it could be fixed.  I would just take it to the nearest dealer.  Except I no longer live anywhere near a BERNINA dealer.
     No problem. When we had The Quilt Company, I was a dealer.  Our son was our Machine Tech.  I just needed to order the part.  
    Our son came to visit and left - without fixing the machine because I kept forgetting to ask my dealer friend, several states away, to order the part for me. I finally remembered and the new screen arrived in February.  Just in time for the stay at home order.  Our son lives in Pennsylvania.  We live in Florida.
     I thought I could wait.  What's a few more weeks?  No problem..... really..... I don't mind..... except that I really do.  I miss my embroidery machine.  Especially now that this shelter in place order is lingering on, and on, and on.  So today, my husband decided to fix it for me.  
This is important:

DO NOT TRY THIS AT HOME!

     Have you ever seen the inside of your sewing machine?  It's a scary place in there!
That photo isn't even as complicated as the 880!

     Armed with the new screen, assorted screw drivers (actual BERNINA tools) and our son on a video chat.  We carefully removed the case..... It was like one of those movies where a doctor talks someone through a complex operation so that the patient can live.  I know I was holding MY breath!
     Brandon, who has the patients of a saint, carefully explained the step-by-step process while watching his Dad's fingers do the work via my phone.  (Full disclosure: My husband did attend a BERNINA Tech training when we became dealers, but that pre-dates the 880).  I feel it is important to repeat:

DO NOT TRY THIS AT HOME!
     It was touch and go for a few minutes, but
She is BACK!  
The operation was a success! I am a happy, happy girl.

The moral of this story is:  Respect both your machine and your dealer.  Treat them both with care.  You might not have a can-do husband with enough professional training to understand the instructions provided by a certified technician.  You might not be lucky enough to have given birth to a certified technician that is willing to stay on the phone for 2+ hours for free, because he wants his Mom to be happy. If that isn't your situation, rest assured that not protecting your machine will cost you a pretty penny and the tech doing your work, will earn every bit of that fee.

Saturday, April 11, 2020

SOMETHING FROM NOTHING


Admit it.  
You have a pile of small triangles stacked somewhere in your sewing space that were the result of a clipped corner project.  There is something about those little triangles that keeps you from tossing them in the trash.  They are already paired together.  You have an entire stack of them.... 
they could BE something.
Today is their day!

Let's turn those clipped corners
into
THIS!

14" Carpenter's Star pillow

The half square triangle are going to be made from those corner clips that were considered trash.

Sew them together and press the seam open.
Now square them up to measure 1 1/2"
to make a finished block that will measure 8".
Make 32 of these.

Arrange the solid squares with the half square triangles to form the Carpenter's Star pattern.
You can work from this diagram or email me at Karen@thequiltcompany.com and put 
CStar in the subject line and I will email you this as a .pdf that you can print.
I placed my pieces on a 12 1/2" square ruler so that I could keep them in order as 
I moved from my sewing machine to my ironing board.
 (My iron is across the room so that I get SOME exercise!)

I chose to use the "web" method to keep this block in order as I assembled it.
I'm not normally a fan of that method, but for this 8" finished block it worked well.

To web the block, chain stitch the squares together in four vertical columns.
The web is created because you don't snip the threads between the pieces before adding the next column of squares.  I chose to make 4 columns of 2 squares.  Then stitch those together in pairs.  Then stitch the two halves together to complete the vertical web.
See how all of the units stay connected with a few stitches 
in-between each pair.


Then sew the pairs together, then the halves, 
with out snipping the joining threads.

Press all of the seams open.
These squares finish at 1".  
Open seams will distribute the bulk and allow the block to lay flat.

Repeat the web process to stitch the horizontal rows without snipping the original web.
Press the seams open.
The back of your block should look something like this.

To finish the block into a 14" pillow you will need:

1/2 yard of fabric for the outer border and backing.
1/8 yard or scraps for the inner border.
15" square of batting
14" pillow form
18" zipper (optional)

From the 1/2 yard of backing and border fabric cut 1 strip 3" by the width of the fabric.
From the remaining section of backing fabric cut 2 strips 3" by the narrow width of the fabric. 
(The short way).

From the inner border fabric cut 2 strips 8 1/2" by 1 1/2" and 
two strips 10 1/2" by 1 1/2"

Add the borders to the completed block.
(You know how to do this.)
Repeat the process 
using the 3" strips cut from the backing fabric.
Now layer the pillow top with the batting and perform the ever popular,
 "quilt as desired" portion of the instructions.

I outlined the inner and outer star about 1/8" from the edge.
I added a straight line in the inner border and a few more in the outer border using matching thread.

Rather than a fold over, sham type backing, I prefer a zipper in my pillows for several reasons.
1. Zippers stay closed.
2. You never have that gap that happens when the sham pulls apart.
I always think that looks like your slip is showing.
3. Zippers allow you to over stuff your pillow so that it doesn't look sad.
4. Pillows flatten with use, so if they don't start out full, things will only get worse.
(Here's a tip: Cut your pillow top the SIZE of your pillowform.  
Once the seam allowance is taken up, it's a bit smaller and you can stuff the pillow form inside.  
That will help fill the corners and make the pillow look better.)

However you have decided to make your backing, place the top and 
backing right sides together and trim to size. 
Stitch completely around the outside edge, backstitching at the corners and stress points.
Clip the corners to remove the bulk.
Turn the pillow right side out through the opening in the backing.
Insert the pillow form and ENJOY!

Now you have a Trash to Treasure!


Friday, April 3, 2020

Indoor Gardening


     I'm doing a little indoor gardening with fabric.  This project will be published as part of a ruler program later, but I'm giving you a sneak peek.  If you would like to do a little test sewing, make a flower or two.  Let me know how you feel about the project in the comments section.  I would love your feedback.

     You are going to need a 60 Degree Ruler for this project.  The formal instructions will also require a Hexagon Trim Tool.  If you have one dust it off you are going to enjoy using it!  If you don't have one, I have a little cheat for you to make a paper template until you can get out of the house and buy a hexagon ruler.  I know you are going to want one.  There are lots of fun ways to use it.
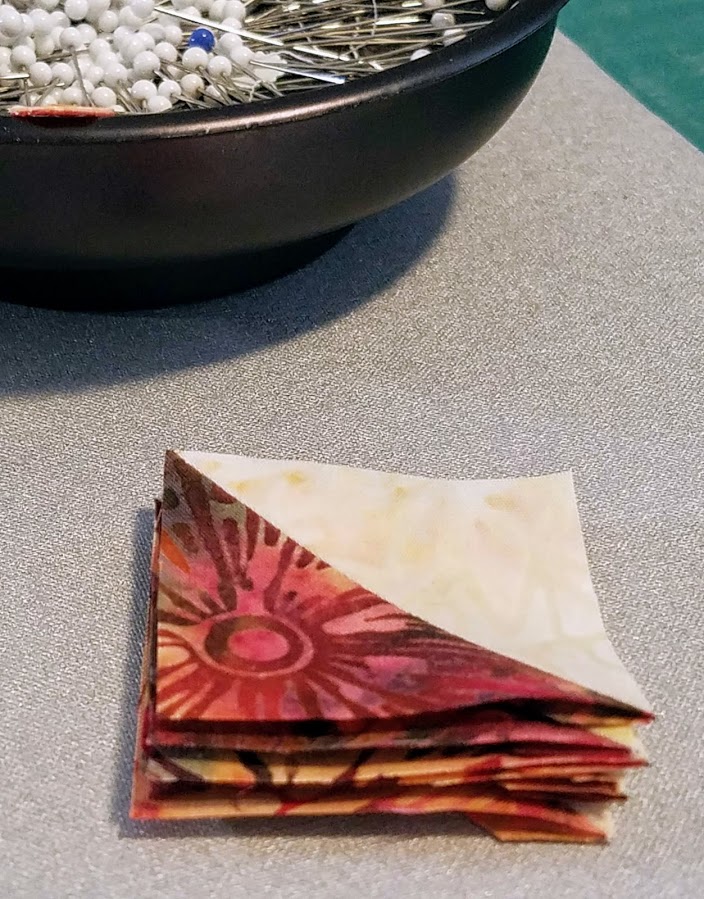
Meanwhile gather up some fabric scraps in greens and flower colors.  I do mean scraps!  You will need a variety of fabrics cut into 1 1/2" strips from 2" to 6" long.  Scraps are perfect.  The more fabrics the merrier but you can get away with as few as 5 shades of a color for each flower.   

Now about that hexagon template.  
  1. You are going to need a regular sheet of paper, a pencil, your 60 degree ruler and rotary cutting supplies.  Make sure you have a SIXTY DEGREE ruler.  That's the one that is equal on all three sides.
  2. Fold the paper in half.  Measure 3 1/4" from the FOLD and cut a paper strip as shown.
  3. Place the 3" line on the edge OPPOSITE the fold, centered on the paper.  Draw a line on each side of the triangle.  The clipped point will NOT reach the fold as shown.

4.  Rotate the ruler and place a POINTED corner (not the flat tip) against the line you have drawn, placing the point on the edge of the paper opposite the fold.  Cut the angle as shown on each side of the drawn triangle.


5. Unfold the paper.

You may want to make one more template before we are ready to sew.

     Each flower starts with a pentagon in the center.  Pentagons have 5 sides.  We want the pentagons to have wonky sides for a more natural look.  The easiest way to make your template is to draw a star, the way you did in elementary school.  The center of your star is a pentagon!  Cut out the center shape.  This will be the template for the center of each flower.  If you are comfortable cutting this shape freehand there is no need to make a template.

The good news is that we don't want all of the sides of the pentagon to be equal.  
If yours is a bit wonky - it is perfect!
If you use freezer paper for this template, you can press the waxy side to the fabric and it will stick.  That makes it easier to cut out the shape.

To make a flower, cut the center fabric using the template. Stitch a scrap strip to one side of the center pentagon.  Press the seam toward the strip.  Trim one end of the strip using the edge of the pentagon as your guide.
Now add a second strip to the trimmed edge. Press and trim one edge. 
     Repeat the process, adding a strip and trim, working your way around the center pentagon in the same way you would make a log cabin block.  Trimming only one side helps you to stay organized and know where to add the strip especially if you decide to make several blocks at one time.
     Once you have added fabric to all five sides, trim the block into a wonky pentagon shape.  Notice that the sides of the new shape are not parallel to the center pentagon.  Just trim, no template required.  My goal was to not have any of the sides be a perfect 90 degrees to help the flowers look more natural.

     I used the places where the strips intersect to help guide me with the trimming.  There is no right or wrong here.  Even if your pentagon turns into an octagon, just trim and keep adding  rounds of strips until the flower is larger than the paper template or the 6" hexagon on the ruler.  Trimming after each round makes it easier to stay organized.  

With all the trimming you are going to create some very pretty trash.  
Remember, you are using up scrap fabric.
If you are a SERIOUS saver, these pieces might be the beginning of a collage quilt!
     Once your flower is a bit larger than the size needed, use the ruler or the template to cut it to size.  To trim with the ruler, cut two sides, rotate the ruler and align the markings on the ruler with the trimmed edges.  Trim two more sides, repeat until all sides are trimmed.  If you are using the paper template, either mark the trim lines on the fabric or hold a rotary ruler against the paper edge to trim.  Be careful not to cut the paper and change the size of your pattern.
One flower finished! 
You will need 7 finished flowers for the table topper.

There is nothing wrong with perfect hexagon shaped flowers, but for that "art school graduate" look, feel free to clip a few corners with green fabric to make things look a little more natural.
(Or to fill in a gap if something went wrong when trimming ; )

Now for some leaves.

     I thought it would be more fun to make them scrappy!  I like the scrappy look, but I do have to admit that it adds considerable bulk to the seams where the triangles meet.  For the pieced leaves, I stitched 1" and 1 1/4" strips together to form a strip set 3 1/2" wide.  Using the 60 degree triangle I cut 12 triangles from the 3 1/2" wide pieced strip.  If you have trouble stitching through bulky layers, I suggest that you cut 12 solid green leaves from a 3 1/2" fabric strip. 


PUTTING IT ALL TOGETHER

     Arrange your flowers and leaves in a hexagon as shown below.  Twist and turn the pieced leaves to create random movement in your garden.  When you are happy with the arrangement, begin sewing units together as shown.  Then join the units together in rows.  If you press all the seams toward the leaves, they will "nest" as you sew the units together.  This is a decorative table topper that won't get much laundering so if you feel better pressing the seams open, that works too.

Even with the extra bulk of the pieced leaves, 
look how well the corners meet when you use the right tools!
A bit of bulk is nothing that a nice straight seam and a good quality steam iron can't handle!

The competed top measures approximately 18" side-to-side or 21" point-to-point.
That's a bit small for our large square coffee table, so I added a dark green border cut 3 1/2".
After some simple machine quilting I may decide to trim that down.  But for now, it's perfect.
It's always easier to trim to make something smaller than to add-on after the project is quilted.
The top of our hexagon garden is complete!
If you prefer a long thin runner, simply make more flowers and make the rows longer.

If you decide to do a little indoor gardening, please post a photo in the comments section!
If you have comments on what you liked or didn't like about making the flowers 
I would love to hear that too.
Enjoy!