Thursday, October 21, 2021

Laundry Room


    Studio e has done it again.  Laundry Room is the name of their new fabric line that I didn't know I needed.  Isn't all fabric laundry?  Now, I can't keep my hands off of these cute prints.  This bundle of goodies arrived as one of my brand ambassador packets from Jaftex, the parent company of Studio e.  Every few weeks I receive a bundle from one of their about-to-be-released fabric lines. My job is to make something.  Anything.  Free range quilting.  I love the challenge.

    I have to admit, this one had me stumped.  Who needs a laundry room quilt?  I am not likely to grab a pumpkin latte and snuggle up next to my washer to read a book.  Obviously this line is more suited for accessory projects.  Like what?  I turned to my Facebook friends for suggestions.  They came through with wonderful ideas!  Everything from clothespin holder (already on the Studio e website as a free pattern: clothespin), to a dog bed (we don't have a dog), to curtains for my laundry room window (we removed the window and added a powder room).  Excellent suggestions, just not what I needed.

    One of the other suggestions was an ironing board cover.  Why didn't I think of that?  I have made plenty of them over the years.  I made the one you see here for my "downstairs" ironing.  My sewing room is upstairs. Nobody, absolutely nobody, wants to iron clothes on my sewing room ironing board.  Unless you would prefer to be covered in random threads.  I keep a normal ironing board for guests to use when the occasion arrives.  Now it has a cute new cover.

    One thing to remember about covering a regular ironing board is that the board is longer than one width of fabric.  That gives you the opportunity to add fabric and mix prints like I did with mine.  When you add strips of fabric to increase the length, press those seams open to distribute the bulk.  You don't want a seam "lump" when you are pressing a tablecloth.  Once you have your fabric a good 5"- 6" longer than the length of your ironing board, you can cut it to fit.  I lay the fabric face down on a flat surface.  Place the ironing board on top and trace the shape of the board a good 2" - 2 1/2" away from the edge of the board.  This does not have to be perfect!  You want enough fabric around the outside edge to cover the side of the board and to fold underneath a bit.  How far from the board you draw this line depends on how thick YOUR ironing board is.  Cut out the shape with the excess on all sides.  I use my rotary cutter and ruler for the straight edges and round the corners free hand.  

    You are going to need some bias binding or wide bias tape and something to gather the cover with to finish the raw edges.  I have tons of leftover BIAS binding from quilts so I use that, even if I have to sew scraps together.  It must be bias binding, not straight of grain binding.  The end of your board is round.  If you don't have any leftover bias binding, you can purchase binding in packages from those big box stores.  I would never put that packaged binding on my quilt, but it works great for this situation.  Open it up, press it flat and fold in half with the raw edges even.  Starting in the center of the square end, stitch the bias binding to the right side of the ironing board cover, the same way you would sew binding to a quilt.  Seam allowance isn't important.  Keep your raw edges even and make sure that the binding is wide enough to accommodate whatever you will be using as a draw string.  This will create a casing for the drawstring.


    For this cover I used elastic as the drawstring.  Any heavy cord will work just fine.  I just happened to have a spool of 1/2" black elastic so I used that.  The elastic has the added advantage of distributing the gathers for you when you put the cover on the board.  I use a bodkin to insert the elastic into the casing created by the binding.  A safety pin would work just fine, but as someone that sews, I think you should own the proper tools for the job!  Once the cover is on the board, pull up the drawstring and tie it in a knot.  Trim the ends or tuck them in.  If you are the type that takes your cover off to wash it, make sure you leave additional length in your drawstring so that the ends don't get sucked into the cover when you untie the cord.  Personally, if I have to take the cover off, it is time to make a new one!
.


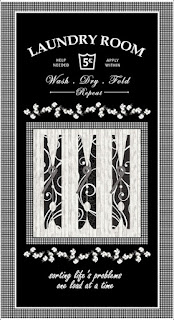
    Along with socks, irons, hangers, clothespins, and other prints, the fabric group also included this panel.  I love panels.... just not all in one piece. Most panels provide tons of creative opportunities.  Simply adding borders, even interesting borders, isn't something I normally do.  If you prefer your panels in one piece, Studio e has a cute pattern on their website: panel project

    As usual, I chose to cut this one up. I used the top section for a smaller wall hanging.  The clothes pin section has great possibilities, but I chose to use it for the backing on my wall hanging.  I have to say that I felt a little guilty about that, but I don't need more than one wall hanging in my laundry room.  That left the smaller section on the bottom.  That was turned into a small 12" by 16" pillow because.... well, why not?


    A little quilting, a little binding and this wall hanging was almost finished.  Then I decided to add the laundry line to the bottom.  My BFF Bernie had given me holder for those small packs of tissues that was designed to look like a mans shirt.  A little adjusting and a whole new set of instructions later I am really happy with this addition to my laundry space.  

    I have shared the instructions for this project with my private group on Facebook.  If you would like a copy of the handout, join the Nine Patch A Day Group on Facebook (make sure you add the word "group" when you search for us).  The group is private, only because Facebook allows me to share files (like this pattern) in a private group.  Everyone is welcome.  I am live in that group on most Sunday evenings at 7:00pm (eastern) to answer questions and talk quilting.  I would love to have you join us!


Monday, October 18, 2021

Honest Instructions

     I sometimes give people weird looks when I am asked a quilting question.  If you get that look, it's not what you think.  I am happy to willingly share my quilting knowledge. I have been in the quilting business for several decades and I have many talented friends and associates.  When faced with a question that I don't know the answer to, I am happy to call, drop an email or send a text to ask an expert.  

    About that weird look I sometimes give, it is usually in response to a simple question.  For example: "Do you normally cut all of your pieces before you start to sew?".  That probably seems like a simple question.  You however have to be patient while my brain sorts out how that is even possible.  I can only assume that YOUR normal procedure is to find a pattern, shop and choose fabric, follow the instructions on the pattern, finish the quilt.  That is not MY process.  As someone that creates the pattern I don't have a pattern to follow when I start.  I have projects that were planned for my king size bed that ended up as lovely table runners.  I also have a pillow top or two that I liked so much they are now quilts large enough to snuggle under on the sofa.  There is no way I could cut everything before I start.  I'm never absolutely sure what I need.  I sometimes forget that everyone doesn't work that way.

    Another statement people make is "Do you have instructions for how you made this project?".  Trust me, what you really want is for me to tell you how YOU can make the project.  My details are not your most efficient method. I've already made the mistakes.  There is no reason why you should repeat them!  If you wanted to make my Partial Credit project following my exact process, it would go something like this:

Step 1.  Order a bolt of black pin dot fabric and put it in the closet with your Christmas fabrics.  Forget about it.

Step 2.  Weeks later sort through your original pattern files on your computer and choose one to work on.  Draft the quilt block on your computer.  Contemplate the most appropriate size for the block.  Take fabric width and cut sizes into consideration.  Decide on 9" blocks with 3" centers.  Arrange a layout for 48 blocks.

Step 3.  Decide on a color pallet of scrap fabrics in shades of red, pink, orange and yellow with a touch of purple.  Sort, press and cut a variety of scrap fabrics by color.  Choose the perfect black and white stripe fabric to use as an accent fabric. 

Step 4.  Assemble the pieces for 9 blocks and arrange them on your design wall.  Decide that the idea of a scrappy center square isn't working.  Remove center squares toss them in the small scrap bin.  Choose a purple floral fabric that can be fussy cut.  Make swiss cheese out of the purple yardage fussy cutting 9 center squares.  Realize that this too is a mistake.  Toss purple squares and remaining yardage into the scrap bin.  Go to bed, hopeful that things will go better in the morning.

Step 5.   Study the pieces for the nine blocks on your design wall as you finish your coffee.  Decide that what you need is 9 more blocks to help you see the bigger picture of where this quilt is going.  This may require a trip to the fabric store.  Remember that the nearest quilt shop in 1 hour away.    Make the parts for 9 additional blocks adding colors in addition to the red, pink, orange and yellow and put them on the wall.  Stare at the wall.  Find another project to work on because this one still isn't working.  2 hours later, remove the pieces from the design wall because you need the space.  Stack them neatly on the edge of your sewing table.  3 days later, move the pieces to the cluttered desk area.  1 week later, put them in a bin for "safe keeping".

Step 6.   Once your pieces have spent sufficient time being ignored, return them to the design wall.  Immediately you will see that the red and darker shades are the problem. Remove pieces with the red and dark fabrics and replace them with "bright pastels".  Return to your original idea of using scrappy squares in the center of each block.  Feel encouraged by your success!  This will provide the energy you need to sew the 18 blocks together.  Sew and press 18 perfect blocks.  Do not celebrate, because something is still not right.  Have at least one glass of wine.  As you drink your wine, contemplate a trip to a quilt shop to find the "right" fabric. 

Step 7.  After a good nights sleep, view the blocks with a fresh new perspective.  Remove the scrappy centers and arrange the remaining pieces for the blocks on your design wall.  Study the block pieces until you spy the stack of black and white Lower the Volume fabrics.  Eureka!  You have found your block centers!  To continue the scrappy theme of this quilt, cut 3 1/2" squares from every black and white print in the fabric line.  Except the Christmas print.  You have to draw the line somewhere.

Step 8.  Rejoice in the choice of the Lower the Volume fabrics for the center as you sew 6 blocks together.  Press these perfect blocks and return them to the design wall.  Study the blocks.  Realize that the black and white stripe that was perfect when you began this journey is no longer appealing.  A this point you will seriously consider tossing the blocks and block parts in the trash can.  Have more wine.

Step 9.  Before you commit the project to the trash can, clean up your sewing room.  As you are putting things away, notice the afore mentioned black pin dot fabric.  Cut a section from the bolt, press and cut into strips.  Rip and stitch to replace the black and white stripe with the black pin dot.  Listen carefully and you may actually hear everything click into place, you have achieved perfection.  The black dot against the Lower the Volume prints is exactly what this quilt needed.  The quilting gods have smiled upon you.  This quilt is going to be excellent! 

Step 10.  Make and assemble 48 blocks into a reasonably sized 54" by 72" quilt top.  Toss the quilt top onto the king size bed in your guest room.  Decide that you love it so much that you will make more blocks so that it actually fits that bed.  Calculate that you will need 52 additional blocks to make that happen.  Question your sanity.  Repeat.

Saturday, September 11, 2021

It takes a Village

     I spent Labor Day Monday packing suitcases for my trip to The Villages here in Florida for a lecture and class.  If you are not familiar with The Villages, it is a senior community in central Florida, about 50 miles north of Orlando.  It is definitely not your average senior community.  First of all it is HUGE and growing.  It is well planned, active and filled with incredibly friendly people.  Those people are fond of saying that if you are bored at The Villages, it is your own fault.  That is not too hard to believe if you spend even a few minutes talking to anyone that lives there about the classes and clubs they enjoy.

    My reason for visiting was to present a lecture to the guild and teach a class using my Scrap Crazy 6" templates.  This program was scheduled and canceled twice because of the pandemic.  Third time is a charm!  I was just glad to be out doing what I love.  The 100+ members that attended the lecture were warm and welcoming, especially considering I arrived with a carload of trash bags filled with quilts and boxes of disorganized materials.  The air conditioning in our mini van died the day before the trip.  That would be the mini van that we own ONLY because it makes it easier to haul everything to classes/lectures/shows.  The idea of going old school with the windows down for the 3+ hour drive in 90 degree weather wasn't all that appealing.  At the last minute my husband decided everything I needed would fit in our smaller car.  We unpacked and stuffed, wedged and squeezed what should have been organized in suitcases into smaller trash bags to make it fit.  Never a dull moment around here!


    Despite being a bit discombobulated when I arrived an hour early for the lecture everything went fine.  I think everyone enjoyed what I had to offer and I certainly enjoyed interacting with the members I had a chance to meet.  Now I am back home, unpacked and I have everything, well mostly.....sort of.... for the most part.... put away.  

    Time to jump back into the thick of things and get some sewing done.  My stack of nine patches from the summer Nine Patch A Day challenge is waiting to be put together.  I have finally decided on a setting for them. If you aren't a member of the Nine Patch A Day Group on Facebook, come join us!  It is a private group.  It is not private to exclude anyone.  It is private because of Facebook rules.  Unlike public pages, private groups can share files.  That allows me to upload handouts or diagrams.  Everyone is welcome!

    This is the setting I have chosen for my 6" blocks.  What you see here is an assortment of my scrappy nine patches stuck on my design wall in no particular order.  I'm trying to decide how to fill in the "holes".  This is going to be a wall hanging for my daughter.  White seems too stark.  Black is too dark.  Grey would be an option, but her walls are grey. Hmmmm.... any suggestions?  Feel free to comment.

    This one is going to spend some time on my design wall while I consider the options.


Sunday, September 5, 2021

What's Under My Needle?

I looked away for one minute and August was GONE!  That month sure went fast. 

    I truly enjoy creating.  Unfortunately sometimes I create without thinking about how that creation will fit in the real world.  Those creative ideas sometimes come back to bite me.  I have often joked that my tombstone is going to read "It was a good idea at the time".  
     This photo is of one end of my Simple Gifts Table Runner.  It is one of my single sheet $2.50 patterns.  Any pattern with SIMPLE in the title, should be simple. This pattern includes the simple shapes for an easy to applique bow.  
    My granddaughter was visiting and thought this runner needed a fancier bow.  Because this sample isn't for the pattern front, I agreed.  It seemed like a simple thing to do to make Madeline happy.  Except... Now the sample doesn't match the pattern and you will see this version in social media.  If you see that image and buy the pattern, you will want THAT bow.  Great!  Except that bow is a three page handout.  It won't fit on the single page pattern.  To make everyone happy, I have made the bow a free handout available at all of my Sewposium shops or in my Nine Patch A Day Group on Facebook.  I do like this bow better, but some decisions are made to make good publishing sense.  Others are made to have some fun with your granddaughter.

    Mid month I received a box of supplies.  That order included a huge pack of hexagons for English Paper Piecing.  Oops!  I ordered the wrong size for my project.  FOUR HUNDRED of the wrong size!  It isn't worth the effort to return them.  I placed a correct order and  I started wondering if I could machine piece these.  It worked!  I have no need to machine piece with foundation papers, but I had to try.  One thing leads to another around here, so I justified my experiment by thinking that these may end up in a sample for my new Grab & Go Bag pattern.  That pattern is for a great little bag with interior and exterior pockets including one that zips!  I expect to release the pattern later this fall.  The problem is, if I use these hexi's to make a sample, I should include instructions for how to machine piece them and that isn't in the original plan.

    These photos are of the working samples of the Grab & Go Bag.  There are 4 more discarded pieces hovering around my trash can. Those were trashed because I wasn't thrilled with the results of the stabilizer.  Although I love working with foam stabilizer, not everyone can handle that bulk on their sewing machine.  My job is to produce patterns that anyone can make.  That means testing lots of readily available products to see which works best in a particular situation.  The discarded samples are like the leftovers in the back of your frig.  I can't seem to toss them until I am sure that they have passed their prime.  You on the other hand can take my basic instructions and upscale the project to fit your sewing needs.  I love when you take a project and make it your own.

    As long as August was for experimenting.  I thought I would toss a little digitizing into the mix.  I have an idea for a series of embroidery designs so I spent several hours working on those.  The designs are seasonal so why not start with ..... February?  
    If you have ever wondered why embroidery designs are so expensive, I have the answer.  It takes FOREVER to digitize a design!  It seems simple, until you get into the details.  Stitches, layering, outlines, tack downs, jump stitches, stitch width, stitch length, hoop size.  It is like juggling a dozen options and one change makes a difference on multiple layers.  Then you have to stitch out the design multiple times to make sure your changes have been incorporated properly.  Crazy as it is.  I love the challenge of getting the designs to look the way I want.  

    To be honest, all this other sewing was just my way of justifying the fact that I am avoiding the 244 half square triangles that I don't really want to make!  
   I agreed to write this pattern, which seemed like a good idea at the time.  The instructions are the easy part.  Now I have to MAKE it. I'm going to love this quilt when it is done.  The colors are beautiful together.  It definately isn't one that I will tell you I really "enjoyed" making.  I prefer to eliminate as many seams as possible when I design a quilt.  For this pattern it just makes sense to create sheets of half square triangles in the correct color combinations. That is easy enough, then you have to sew them together.  The same fabric you just cut apart.  I'm going to do it... I really will... just not today... possibly tomorrow.  Unless something more "important" comes up.


Oh look... FedEx just delivered a package.  
It looks like important fabric!


Monday, July 26, 2021

Out of Sync


    When this fabric bundle arrived from Jaftex, I had to stop and think about the date.  I don't mean the number associated with that day.  It took a minute for the month and current season to register in my brain.  Working from home and living in the sunshine state can sometimes make you forget exactly what time of year it is.   

    This is the Stars and Stripes Forever group from Studio e.  It was delivered about 10 days AFTER the 4th of July.  Taking a page from the movie Groundhogs Day, I have spent the last week and a half "celebrating" the 4th of July. 


    Choosing a pattern wasn't difficult.  I have one in my files that I used for a Quilts of Valor project years ago.  The pattern makes a nice large quilt with a generous border and easy to piece blocks. I have never published the pattern, because it is SO easy.  After I enjoyed making this quilt, I think I will reconsider.  You should be able to have fun making this without the math calculations!

    The blocks go together super quick.  One other secret is that these blocks can easily be squared up to any size after you assemble them.  That was particularly helpful in the plan for the first quilt made from this pattern.  Those blocks were assembled by a few dozen of my oldest daughters friends.  Most of them had no sewing experience, but they wanted to make a quilt to support Quilts of Valor.  Once the blocks were returned to me, I trimmed them all to a uniform size.  I made all the blocks for this quilt, so the variations were minimal.  You don't have to square them up, but you can without changing the look of the pattern.


    Once the blocks were complete, it only took an afternoon to assemble the blocks into the quilt top and add the border.  Then it was ready for the longarm.  I chose a curved pattern for the quilting.  Stars just seemed like a obvious of a choice and I wanted something a little different.  

    I was thrilled with the speed of the progress on this project.... until I got to the binding.  Have you ever worked on a binding so long that you are absolutely sure the quilt has developed six or more sides?

     This binding is done by machine, but the quilt is large so it required nine binding strips sewn together end-to-end on a 45 degree angle.  Nine red and nine navy.  Then those were sewn together along the length.  The seam was pressed open and then all 360 inches of sew was pressed a second time to press it to one side.  Then the whole long length was pressed in half.  Once the binding was prepared it was stitched to the back of the quilt and pressed yet again to make sure that I was working with the full extension of the binding fabric.  Then I folded it over the raw edge and pinned it in place on the front of the quilt, mitering the corners.  Securing it in place required stitching around the entire quilt one more time on that little red flange to hold the binding in place.  Done and done.

    Now for some fun!  Time to take the style shots of the finished quilt.  This photo is of the quilt on the bed in our guest room.  It is nice having an "empty nest" where I can stage shots in our extra bedrooms without disturbing anyone.  I have also been known to bother the neighbors to get a good shot.  Knock, knock. "Can I borrow your front porch to take a photo of this quilt?"  

    Taking the photos sometimes feels a bit like cheating.  The quilt is twin size.  I have displayed it sideways on a king size bed.  I don't want to ruin the "magic" but I didn't make those pillows either.  The red/white/blue ones are just fabric from the Stars and Stripes Forever line wrapped and pinned around some Christmas pillows.  The larger red one has a giant jingle bell on the back!  A girls gotta do what a girls gotta do.

    One last item.  The Stars and Stripes Forever fabric group comes with two panels.  One is an American flag print and the other is this pennant design.  I took the no-sew approach to the pennant panel and fused Steam-a-Seam2 to the back of the triangles. Once they were fused, I rough cut them out and pressed the fabric onto a piece of cardstock.  Then I trimmed each one into the pennant shape.  The printed shape has an extension of about 1/2" at the top.  I placed the cardstock even with that line.  It gave me enough fabric to fold over the top and secure a length of ribbon using the Steam-a-Seam2 that was already on the fabric.  By adding a ribbon to each triangle, I can tie them together in groups to make the length I need.

    Here is a photo of a few of the finished pennants in my kitchen.  That bottom shelf usually holds floral print coffee mugs, but they clashed with the red/white/blue theme.  

    When I tie all seventeen of the pennants together I will have enough to decorate the pergola on our deck!  I might just do that.  Hang them up, toss the quilt over the table and set the scene for the 4th of July.  The neighbors won't blink an eye.  Oh... neighbors.... I wonder if the pennants would be long enough to stretch across Dan an Kristen's new pool?  We could stage an Olympic swimming shot!


Monday, July 19, 2021

Sometimes You Just Have To Sew

    One glance in my sewing room and it is absolutely obvious that the scrap situation is out of control.  Normally this would not be a problem because I consider myself primarily a scrap quilter.  Lately, or more accurately, for well over a year I have created plenty of quilts, but only a few were SCRAP quilts.  Even the quilts that may look scrappy, were created from new fabric lines, which only added to my scrap storage problem.  Something had to be done.

    I design the Scrap Crazy Template sets for Creative Grids.  There are three sets of templates available.  The original Scrap Crazy set and the Crazier Eights set both make an 8" finished block.  The third set creates a 6" finished block.  All three sets make a unique Crazy Patch block to help you use up your scraps in the most effective way possible.  Obviously I need to put mine to good use.

    Crazy Patch quilting is simple and fun to do, but without a plan you can find yourself in a situation that is referred to as "up the creek".  In order to continue adding pieces to your block, you will need a set-in seam or a Y-seam.  The Scrap Crazy template sets eliminate that issue because they are guaranteed to fit back together with simple straight line sewing.  Another bonus is that as you rotary cut, the dog-ears are pre-trimmed on the templates so that there is no doubt about the placement.  Simply line up the edges and sew!  Even better, the templates work in different combinations to make unique quilt patterns that probably wouldn't consider without a template.  These are just a few of the quilts from the companion books that go with each set.

    
    Now, back to my overwhelming scrap fabric problem.  It is time to put those templates to work.  I decided to set aside the projects on my to-do list for an entire day and simply enjoy sewing something without a deadline.  I had an idea rolling around in my head to use the A template from the Crazier Eights set (that is the kite shaped piece that fits in the corner).  I cut four of the A template from the same piece of fabric and pressed all of the blue, green, aqua, purple, sage, navy, grass, lime, teal,... basically any color in the blue, green or purple family, that I could find in that basket.  Any scrap 3" or longer and 1" wide was pressed and ready to use.

    Here is a photo of the nine blocks I created in one day.  They will measure 10" in the finished quilt.  Not a lot of progress for an entire day of sewing, pressing and trimming.  Then again, not everything worthwhile is "fast and fun" or "quick and easy".  Sometimes it is worth the time and effort to slow down and enjoy the process.  

    There were plenty of creative moments working on these blocks.  Right from the start I decided on that half inch black outline to emphasize the scrappy diamond shapes.  With half the blocks completed, I decided I didn't like the black.  After a quick trip to the grocery store, I gave it a second look and decide I was right in the first place, those black lines keep the scraps from fading into the kite shapes.  That started the creative ball rolling.  What if the background were neutral and the scraps in high contrast?  What if the star points didn't meet? What would it look like if I added a scrappy narrow sashing? What if the A template were scraps and the diamonds were solid?  Remember, I don't have a pattern to follow.  If I love this in the end and think that you will too, I may write instructions for the project.  Right now, I just want to sew and make something beautiful.

    My goal was to clean out scraps.  The kite shapes are actually cut from what I consider scrap fabric.  They are larger pieces left over from other projects.  Larger pieces are not my problem.  It is those small scraps I thought I would be clearing out of my stash.  I can't say that these blocks didn't use up plenty of fabric.  Because I was trimming to assorted widths from odd shaped scraps, plenty of fabric ended up in my trash basket.  In fact it looks as if as much was tossed as ended up in the blocks!

    Throwing away the trimmings is not a problem for me.  I know that the best part of that scrap now lives in a pretty cool block that will eventually become a pretty cool quilt.  Everything in that trash basket is less than 3/4" wide.  Scraps that were larger than that, but not suitable for strips have been set aside.  There may be some crumb quilting in my future.  Meanwhile I will be making at least three more blocks for this project.  Possibly more, but right now I have to get back to that to-do list.

Tuesday, July 13, 2021

Loaves and Fishes


    I have come to the conclusion that anyone that denies the accuracy of the biblical story of the loaves and the fishes, has obviously never made a scrap quilt.  Normally I would stay away from topics like politics and religion here on the blog, but my last project seems to have proven the impossible.

    There is no denying that I have a substantial "stash" of fabric.  Including everything from tiny scraps, fat quarters, one yard cuts and yes, even bolts.  Although I have enough fabric to last a lifetime, that has never stopped me from adding more when I find something I like.  Other additions to my shelves and bins come from the work I do for fabric manufacturers.  The best way that I have found to keep my stash under control is to keep sewing.  Luckily that's my job.  

    A few of my scrap bins are sorted by style.  This particular bin holds my assortment of what I call Kim Diehl fabrics.  Kim is a designer with a specific style and color pallet that I enjoy.  My bin contains fabrics from a variety of designers and fabric companies, not just Kim. But all of the colors and prints play well with Kim's designs.  The shades are warm and toasty.  I think of them as "decorator" colors because they are easy to live with.  These colors and fabrics fit well into our house in Pennsylvania, but are a little dark and subdued for Florida living.  That doesn't mean I have given up this color pallet or style but I do think it is time to clean out that overflowing bin.

    Next up on my things-to-do list was the filming of the video class for the Baby Chains project in the Summer Fun Bundle program.  If you aren't familiar with the Fun Bundle series, the program works like this: You purchase a bundle of fabrics, patterns and notions from a participating shop.  Your bundle includes an invitation to a private Facebook group where you can watch a video lesson on how to make the projects.  The videos include lots of additional info that is not included in the original patterns as well as step-by-step instructions filmed by me.  Baby Chains is a scrap quilt, and I think it is the perfect place to clean out that bin of fabrics.

    Here is a quick snapshot of the blocks that I made for the step-by-step video. The blocks are arranged on my design wall so that I can show how I assemble a quilt top working both horizontally and vertically.

    I admit that this isn't a huge quilt, but I did clean out all of the scraps of black background Kim Diehl prints that were some of my favorites. I used up lots of the red and rust colors from the Henry Glass groups that were the most recent additions to the bin.  This quilt also contains the last bit of a favorite blue fabric I have been holding on to for years.

The materials list for this quilt includes a total of just over 3 1/2 yards of fabric.  It stands to reason that after making these blocks there would be 3 1/2 yards missing from the afore mentioned bin - right?   Three and one half yards.  That is equivalent to a length of fabric one hundred and twenty six inches long by at least forty inches wide! A total of 5040 square inches of fabric have been removed from that bin and assembled into the quilt top.  There should be lots of empty space in that bin.

    That is not how scrap quilting works.  

    Even after my attempt to refold the small scraps into slivers so that only the edge shows. it became clear that what came out of that bin was going to have a tough time fitting back in.

    How is that possible?  I have no idea.  What I do know is that it is time to buy a larger bin.


If you would like more info on how to participate in the Summer Fun Bundle program email me at Karen@thequiltcompany.com and I will be happy to send you a list of the participating shops with links to their websites and/or Facebook pages.