
Abby's Treasures, Part 2.
My block frames are ready! The next step is to decide how to fill the center of the blocks. Another Flying Geese unit fits perfectly between the corner squares. That is a very easy decision, but it does leave two options. The geese can point out toward the edge or in toward the center. One arrangement gives the block a square-in-a-square look. The other creates a star in the center. Who doesn't love a star block? The problem is, you can't see the star if the fabrics don't provide enough contrast. Time to rethink the plan.


To make this quilt really scrappy, the sashing between the blocks is going to include all of the main fabrics. I have set one fabric aside, a diagonal green stripe, for binding. Three of the 24 prints are being used in the background along with the piece from Denim & Dirt. That leaves 20 prints, most of which are on the darker side to be used in the blocks and sashing. That's a pretty dark color pallet. I need to work more light background into the design to lighten this quilt up and show off the pretty prints.

Clipping the corners with a background print should do the trick. It lightens up the block and allows the fabrics to shine. It also means that the best position for the geese is pointing toward the outer edge. Turning them around would make the background fabric the star points and after adding a darker center, it wouldn't look like a star. Sometimes decisions are made for you in the design process. One thing I do know, those clipped corners are accumulating!

Decisions, decisions, decisions. The original block design had a Four Patch in the center. I wasn't happy with that because it looked like too many of the same size squares to me. The scrappy fabric choice also presented a contrast problem. I felt that I needed a more balanced design for the center unit.

All of my units so far were based on a strip cut 2 1/2". When I started I had cut several 2 1/2" strips from each of the 23 fat quarters (remember, one fabric was set aside for binding). Assuming I would pair 2" finished squares with the 12" finished blocks as the sashing, I knew I would need LOTS of them. For my second attempt at creating an interesting center unit, I made a simple Nine Patch block and used my 4 1/2" ruler to trim it on point. Now we are getting somewhere! That is definitely more interesting than a simple 4 Patch block. But... all of the edges in that center square are on the bias.

A little bias, especially in the center of the block, never scared me. However, I may be writing instructions for this project sometime in the future. Consumers - meaning those of you reading this blog - tend to have an unrealistic fear of bias edges. I could write the instructions to cut the pieces so that the edges of this unit were on the straight of grain, but that would wreak havoc with the direction of my stripe fabric. Not to mention that the tiny side triangles measure about 1/2". I'm not sure the design is worth the effort of cutting and piecing 1/2" triangles. On to option #3.
I constructed a second Nine Patch using my stacks of 2 1/2" squares. To balance the color I repeated the triangle fabric in the center square. The four corners match and the four side squares match, allowing me to use a stripe that would radiate or parallel the center square. I trimmed that down using my 4 1/2" square ruler. Future instructions will be easy to write using the actual measurements. 
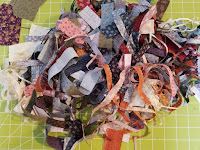

To be honest, there were several variations in all three of the options before I settled on the photos you see here. Next to every new quilt pattern is a huge pile of fabric scraps that didn't work out, looked wrong, were the wrong size or scale, didn't match.... That explains why my trash bin looks like this:

My blocks are almost complete! I'm happy with the "light" areas that will soon be surrounded by dark. The block centers are interesting without being difficult to piece. There is enough organization of color to keep the quilt from looking scrambled. I considered using the same fabric for all four of the outside corners, but the blocks have enough repetition. Why not go scrap crazy with the sashing? Stay tuned to see the sashing next week!
No comments:
Post a Comment